


Blog, Optical Networking
What Is Fiber Optic Cable Splicing? A Beginner’s Guide

Sep
Fiber optic cables are critical telecommunications facilities. We need to connect two fiber optic cables when they are accidentally cut or lengthened. We now need to understand the fiber optic cable connection method. This article will introduce fiber optic cable splicing and how to splice fiber optic cables.
Table of contents
What is fiber optic cable splicing?
Fiber optic cable splicing involves joining two fiber optic cables together. Another method of connecting optical fibers is termination or connectorization, which consists of processing the end of a fiber optic bundle so that it can be connected to other fibers or devices through fiber optic connectors.
Fiber optic splicing is often the preferred way to connect two fiber optic cables because it has lower light loss (attenuation) and back reflection than connectorization.
Fusion splicing and mechanical splicing are the two most common methods of fiber optic splicing.
Mechanical splicing vs. fusion splicing
Mechanical splicing
This method is a simple device designed to accurately align two ends of an optical fiber with a mechanical assembly so light can pass from one end to the other. The fibers formed by this type of splicing are not permanently attached but are held in the exact position. The typical loss for mechanical splicing is 0.1 to 0.3 dB.

Fusion splicing
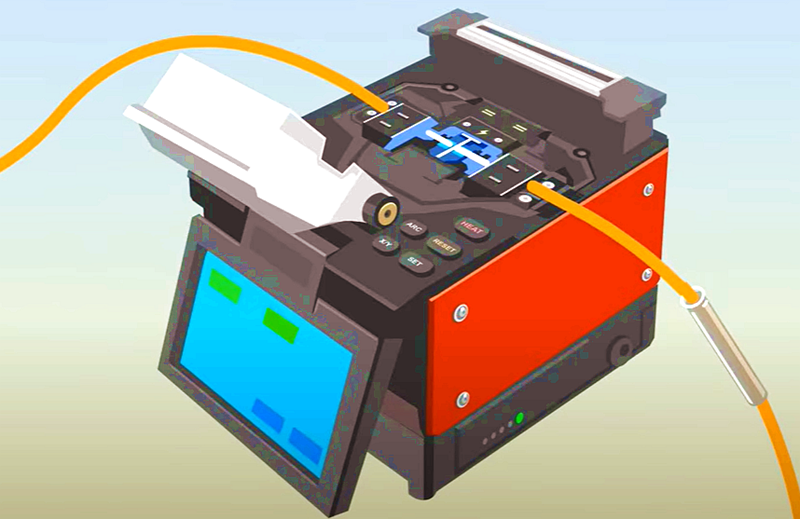
Fusion splicing requires a fiber optic fusion splicer. In fusion splicing, a machine precisely aligns the two fiber ends and uses the heat generated by an electric arc to “fuse” or “weld” the glass ends together. This creates a continuous connection between the fibers, resulting in low-loss optical transmission. Typical losses for fusion splicing are 0.01 to 0.03 dB.

Comparison of the three types of fiber optic connections
| Comparison | Advantage | Disadvantage | |
| Termination (Connectorization) | The use of connectors is more straightforward to operate, no special equipment is required, and time and economic costs are saved | The optical loss of terminations terminated with connectors is higher than that of splicing terminations | |
| splice | Mechanical splice | Splicing provides a stronger, more reliable splice than using connectors and has lower insertion loss. It can be used to mix several different types of fiber optic cables. | Splicing requires skilled operators, and the cost of splicing assembly can be significant. |
| Fusion Splice | This connection results in a permanent link with the lowest attenuation of any connection method. | The connection is fragile, the connection cost is relatively high, and the operation is complicated. | |
How does fusion splicing work?
Fusion splicer imaging technology aligns the two ends of the fiber core that must be fusion spliced. An electric arc is then created between the two electrodes, which provides heat to heat the ends of the fiber, welding the two ends together. The integrity of the weld is then further tested by pulling on the fiber.
How to fusion splicing fiber cables
Preparation
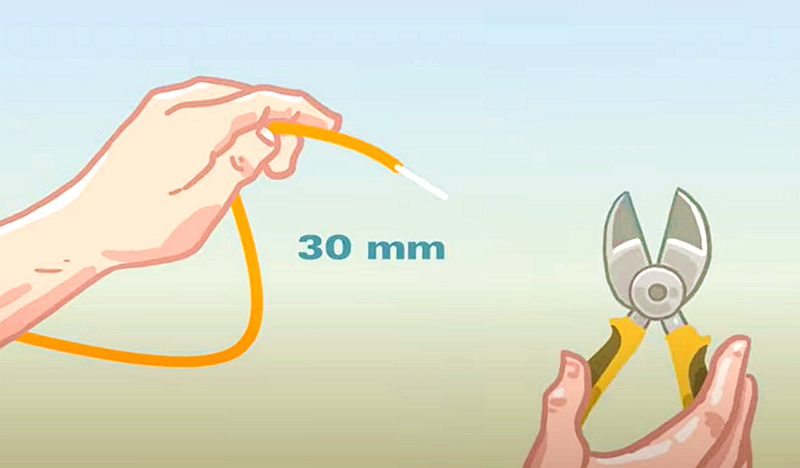
#1. Strip the fiber A: Remove the cable jacket and coating. Using a tool such as a mechanical fiber optic stripper, smoothly strip away the coating and exterior until only the bare fiber optic core remains.
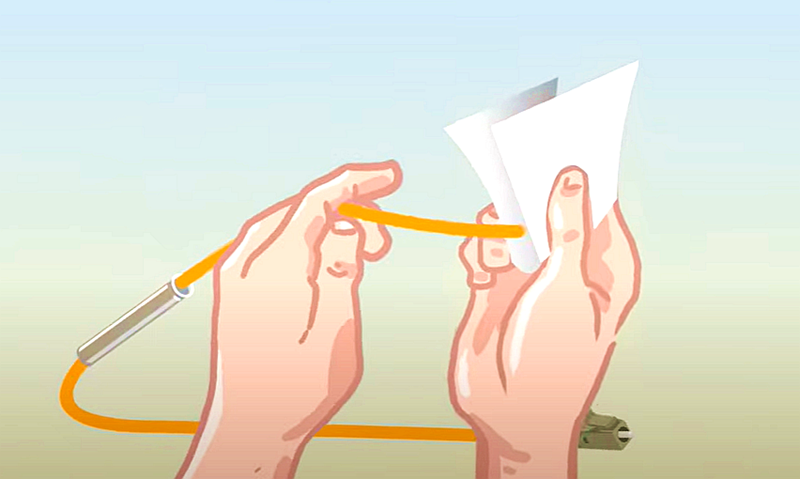
#2. Clean fiber A: Use lint-free paper coated with fiber optic cleaning fluid to gently wipe and remove most contaminants, such as dust and particles. When you hear a squeak, indicating that the fiber is clean.

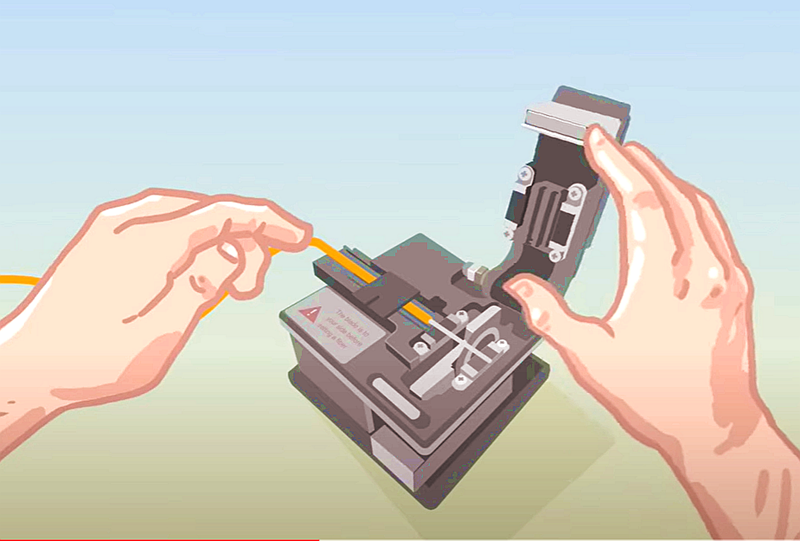
#3. Cut fiber A: fiber A into the fiber cleavers, then close the clamp to keep it fixed. Carefully create a break within the fiber with the end perpendicular to the fiber axis using the fiber cleavers.
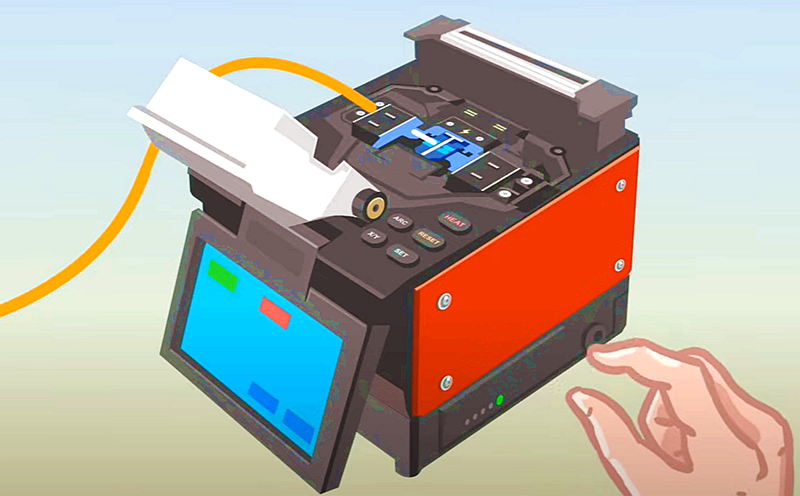
#4. Place Fiber A: Place Fiber A on the fusion splicer and close the holder cover.
#5. Strip fiber B: Follow the first step to strip the sheath and coat the fiber bundle B. But pay attention: don’t forget to slide in the protective sleeve in advance.

#6. Clean and Cut Fiber B: follow the second and third steps of the operation.
#7. Place Fiber B: Place Fiber B on the fusion splicer and close the holder cover as above.
Fusion splicing fiber optic cable
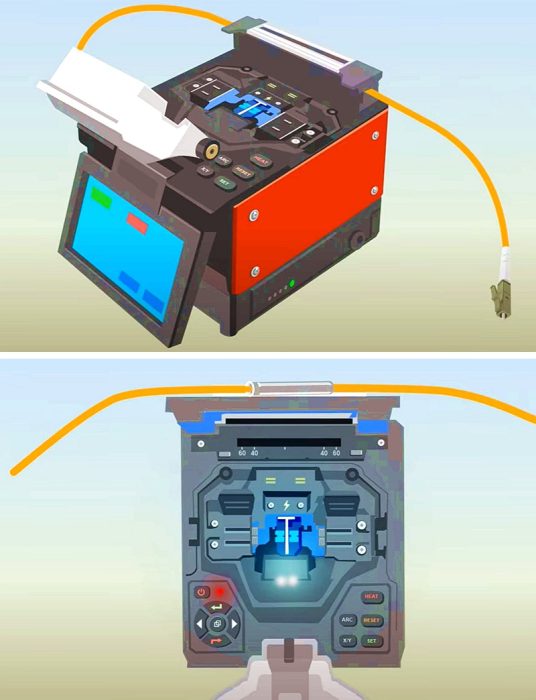
#8. Align the fibers: If you use a fusion splicer with an automatic alignment function, just put the end of the fiber into the holder of the device and click the set button. For a manually aligned fusion splicer, match the fiber end face to center the electrode.

#9. Fusion fiber: The device will weld the two ends together and then test to ensure they are firmly connected.

#10. Protecting the splice: After checking the fusion, open the two clip-on fiber holders, then slide the protective sleeve upward between the two fibers. Put the sleeve into the protective sleeve heater and cover the lid. The sleeve will be set automatically.
Then, move the fused fiber to the cooling tray, and the whole process is finished.
Conclusion
In this blog, I briefly introduce the three ways of connecting fiber optics and show the steps for fiber optic cable splicing.
You can extend the transmission distance of fiber optic cables through fusion splicing, repair fiber optic cables cut by accident, and minimize losses.
I hope this article has helped you gain a preliminary understanding of fiber optic connections. Please try to splice the fiber, and if there are any problems with the article, please contact me!
Read more
- Loopback Cable: What It Is & How to Use It
- Fiber Optic Cable Distance: A Comprehensive Guide
- LC vs SC vs MU Connectors: What is the Difference?
- What is Optical Transceiver: A Beginner Guide (2024)
Reference