Optical Transceiver
How to install and remove SFP/SFP+ transceiver?
The SFP (Small Form Factor Pluggable) or SFP+ transceiver is a critical component of fiber optic network cabling. It is used as a hot-swappable I/O device that plugs into a module slot for Gigabit transport. Failure to install an SFP or SFP+ transceiver can cause damage to the transceiver and the optical network. Do you know how to install an SFP transceiver and remove it correctly?
Before installing an SFP or SFP+ module, we need to know some caution tips first.
Caution:
● Avoid allowing dust and other contaminants to enter the optical bores of the SFP or SFP+ module because the optics do not function properly when blocked by dust. After removing the optical cables, protect them by inserting clean dust plugs into the SFP or SFP+ modules, and make sure to clean the optical surfaces of the fiber cables before reinserting them into the optical bores of the SFP or SFP+ modules.
● Always follow ESD precautionary procedures when inserting or removing SFP or SFP+ modules. Use anti-static equipment. If no antistatic equipment is available, ground yourself by touching a metal part of the equipment chassis.
● Always wear a grounded wrist strap when working on electrical equipment.
● Treat all components, assemblies, and interface connections as static-sensitive.
● Avoid working in carpeted areas and minimize physical movement when removing or installing SFP modules to minimize the build-up of static charges.
● The SFP transceiver can be hot-swapped; you do not need to power off the switch to install the SFP transceiver. However, be sure to remove the fiber cable before removing the transceiver.
Warning: Invisible laser radiation can be emitted from disconnected fibers or connectors, make sure you have taken the necessary precautions to safely handle the laser before installing the transceiver in your equipment.
How to install an SFP or SFP+ transceiver module
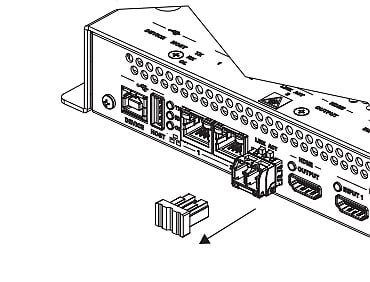
To insert an SFP or SFP+ module into the open SFP port, do the following.
Note: Close the latch before inserting the SFP or SFP+ module.
Align the SFP module with the port, with the golden finger facing down.
Caution:
● Make sure the transceiver is properly aligned before sliding it into the port. Failure to align may cause the pins to bend, rendering the transceiver unusable.
● Do not remove the rubber protectors on the ends of the fiber optic SFP or SFP+ modules until they are installed and ready for cable connection and use. This is to prevent dust and other contaminants from entering the module’s optical holes, as the optics do not work properly when blocked by dust.
Using both hands, carefully insert the SFP transceiver into the empty port. The connector must be facing the port. Gently slide the transceiver in until you hear a click, indicating it is firmly seated.

Remove the rubber safety cap from the end of the transceiver and cable, and insert the fiber cable into the transceiver.

Warning: Do not leave the fiber optic transceiver exposed except when inserting or removing fiber optic cables. Safety caps keep the ports clean and prevent accidental exposure to lasers.
How to remove an SFP or SFP+ transceiver
Remove the fiber cable connected to the SFP or SFP+ module (if present).

Using your finger, pull the bail latch on the transceiver to unlock the transceiver.
Note: If the latch is blocked and you cannot open it with your index finger, use a small, one-way screwdriver or other slender tools to open the latch.
Grasp the module with your thumb and forefinger and carefully slide it out of the port.


